How to start using TronLink wallet
Step 1.
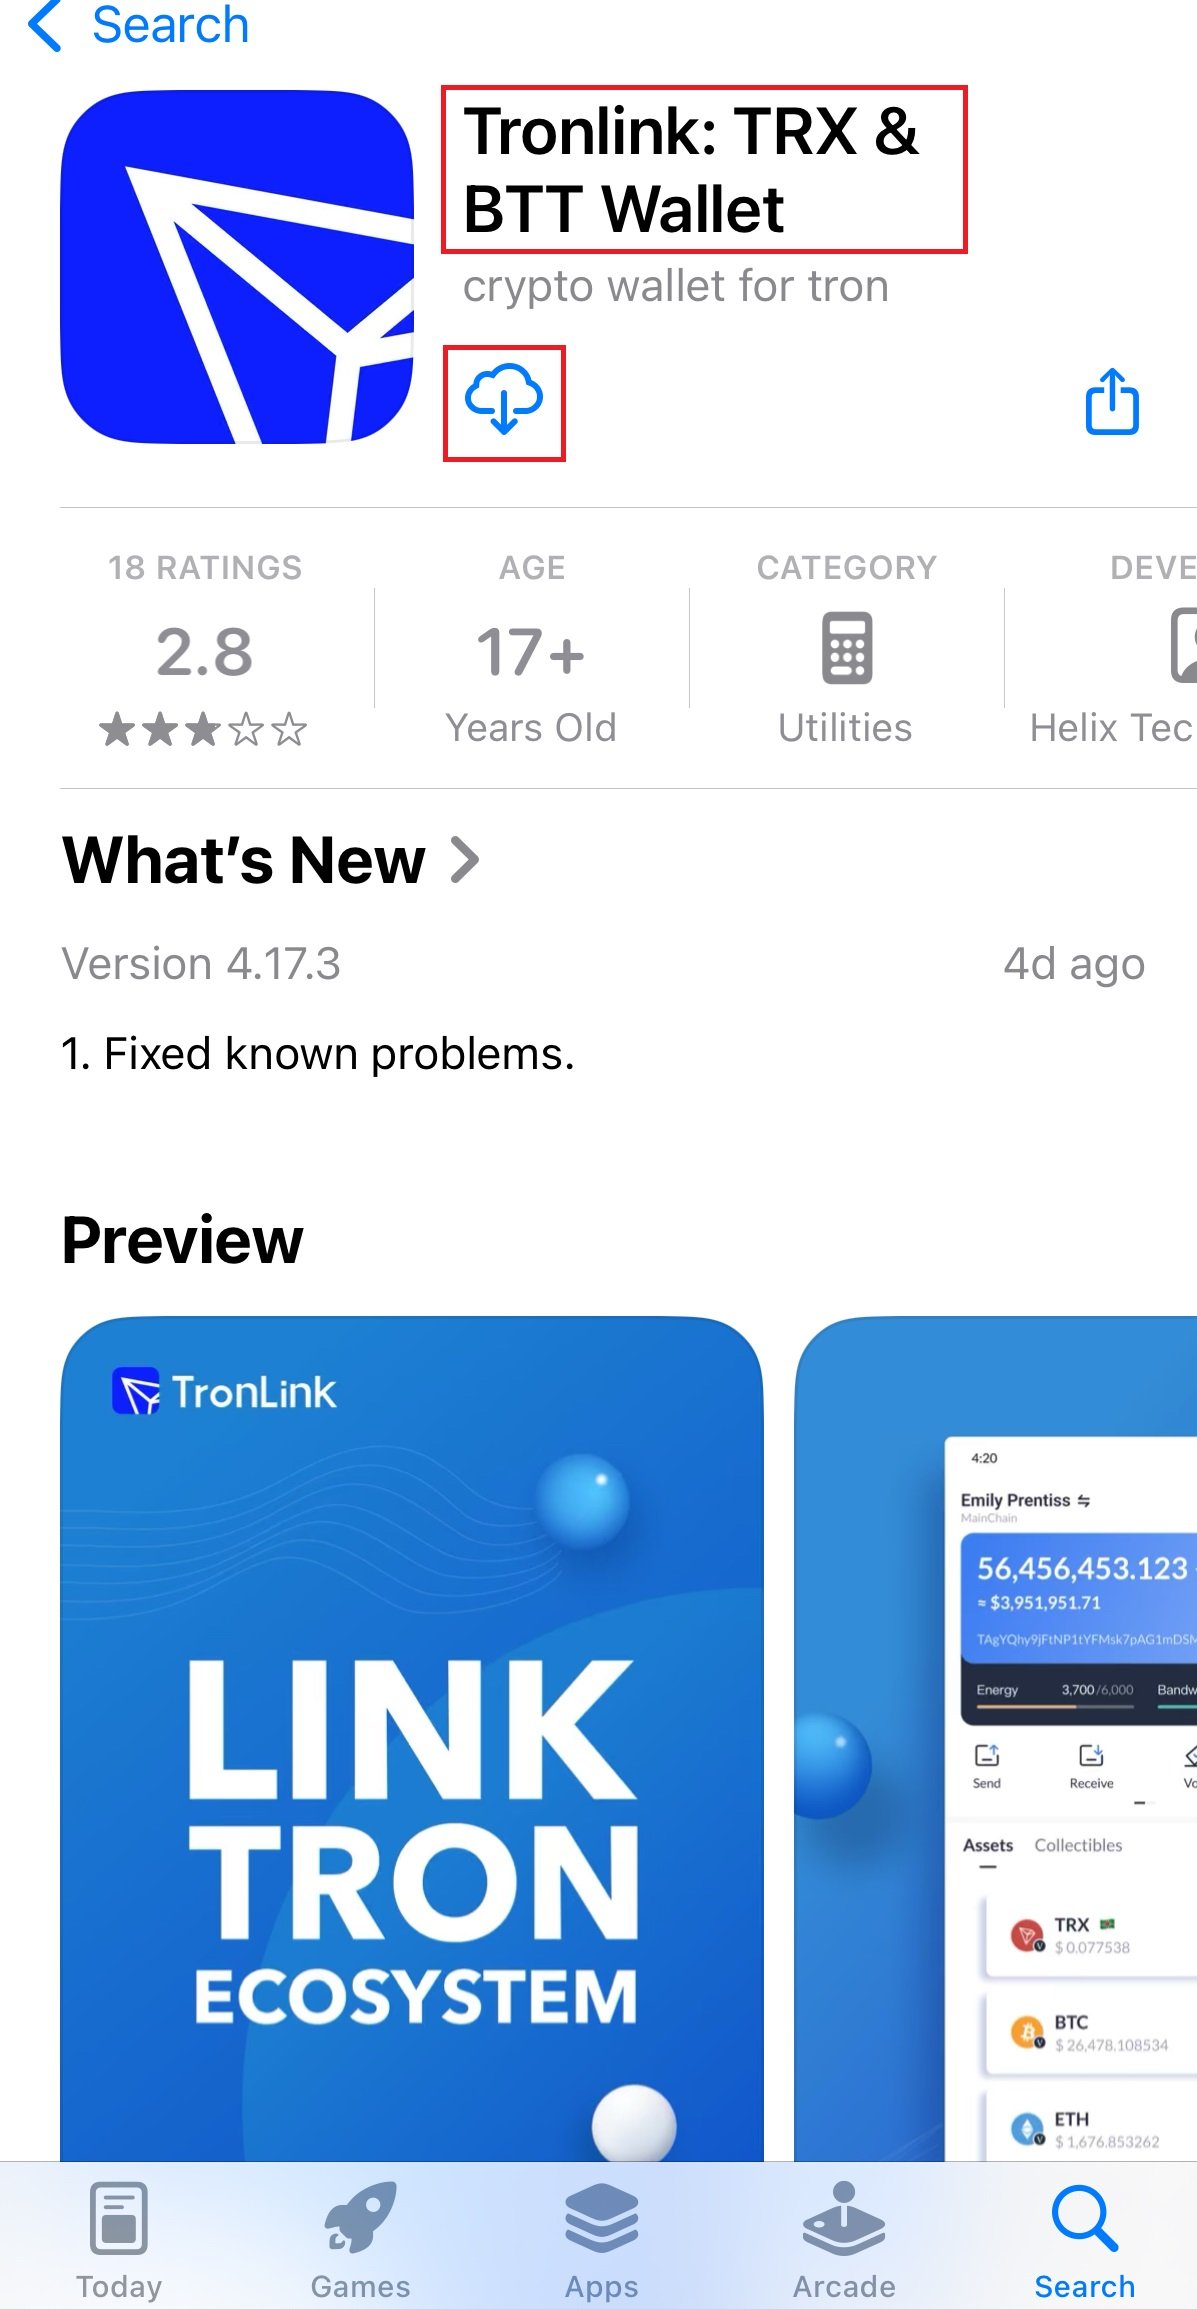
Install TronLink

For iPhone (iOS)
Install via the App Store

For Android
Download via Google Play
https://play.google.com/store/apps/details?id=com.tronlinkpro.wallet

For computer (Chrome extension)
Install via the App Store
https://chromewebstore.google.com/detail/tronlink/ibnejdfjmmkpcnlpebklmnkoeoihofec
Step 2.
Create a wallet
1. open the TronLink application

2. Click "Create Wallet"

3. Think of a wallet name, a strong password and confirm it

4. Keep a secret phrase (12 words) - this is important! Write it on paper and don't show it to anyone.

5. Choose the secret right words

Done. Your wallet has been created.

Location of your wallet number

Step 3.
Activate your wallet - top up TRX
Without TRX the wallet is not active. You will not be able to send or receive anything.
Where to buy TRX (TRON network coin):
Binance/Bybit exchanges
- Sign up: https://binance.com | https://www.bybit.com/
- Refill from your card or via P2P
- Buy TRX and output to an address from TronLink
P2P platforms (without registration on the exchange)
https://www.bestchange.ru | https://exnode.ru
Third party wallet - if you already have one, you can transfer TRX from there
Step 4.
How to find a refill address
- Open TronLink
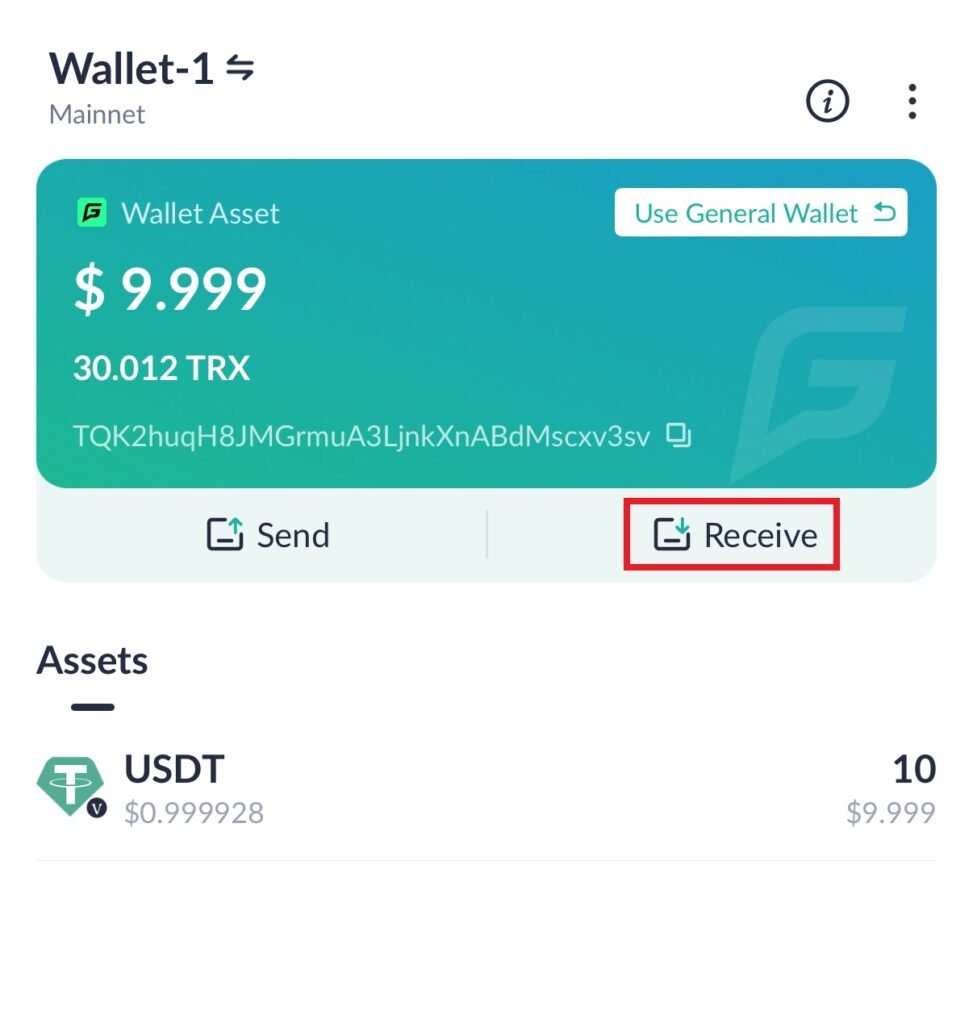
- Click on your wallet → Get button
- Copy your TRON address (starts with T...)
- Paste this address when sending TRX from Binance or another wallet
Step 5.
Make sure the correct network is selected
At the top of the application it should say: Mainnet (TRON). If not, tap and select.
Step 6.
Now you can:
- Receive and send USDT (TRC-20)
- Store any TRC-20 tokens
- Participate in projects, use dApps, connect wallet to websites
IT'S IMPORTANT TO REMEMBER!
- Commissions on the TRON network are only paid in TRX - keep at least 3-5 TRX on your wallet balance
- Don't trust anyone with your secret phrase! (12 words)
- Always make sure the network is Mainnet
What GasFree in TronLink is and how it works
1. GasFree Wallet - a separate sub-wallet (special account) in TronLink, linked to your regular wallet. Allows you to conduct USDT (TRC-20) transactions without TRX, paying commissions directly in USDT.
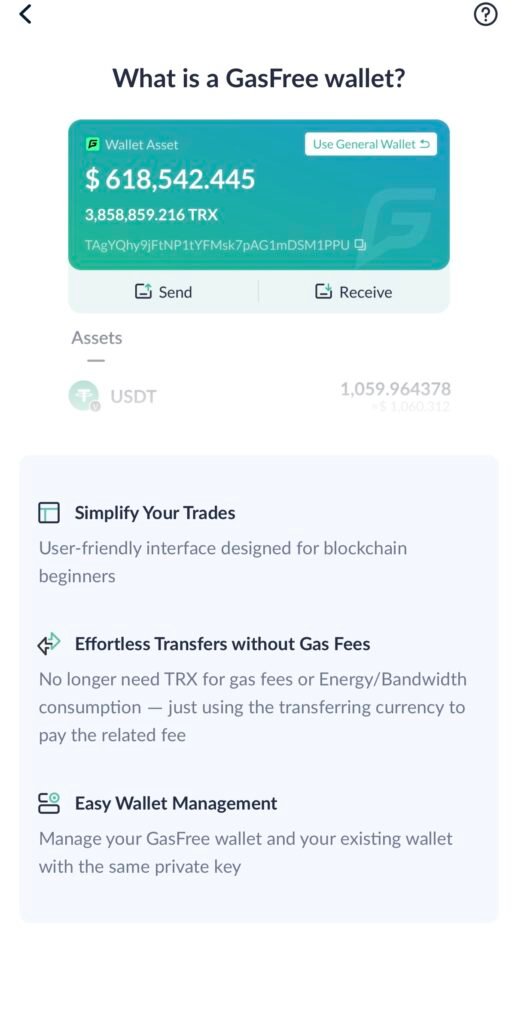
Simplify your transactions
An intuitive interface designed for beginner blockchain users.
Easy transfers with no gas fees
You no longer need TRX to pay gas or energy/bandwidth usage fees - the transferable currency itself is used to pay the fees.
Easy wallet management
Manage your GasFree wallet and your existing wallet with the same private key.
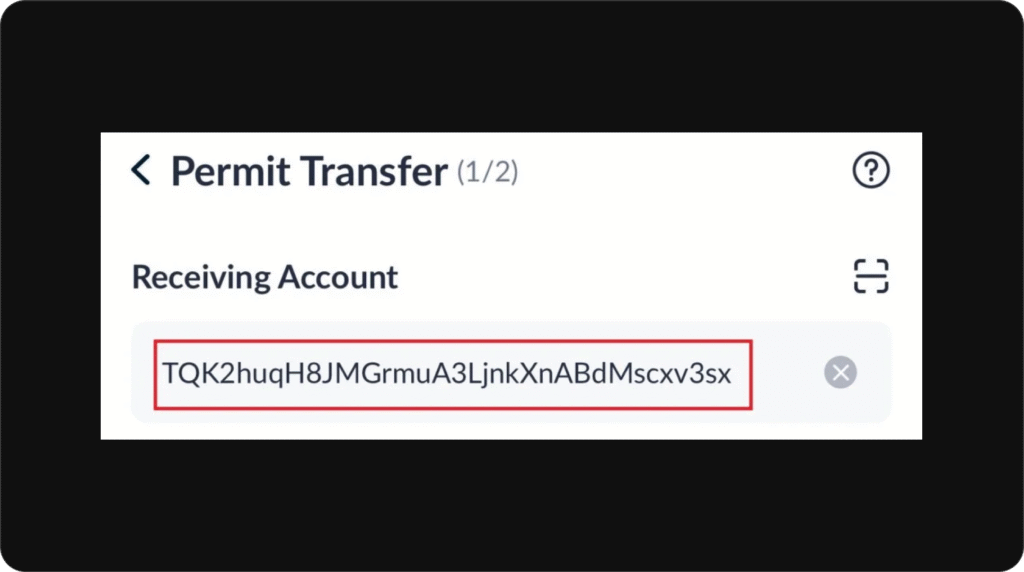
2. What the translation process looks like:
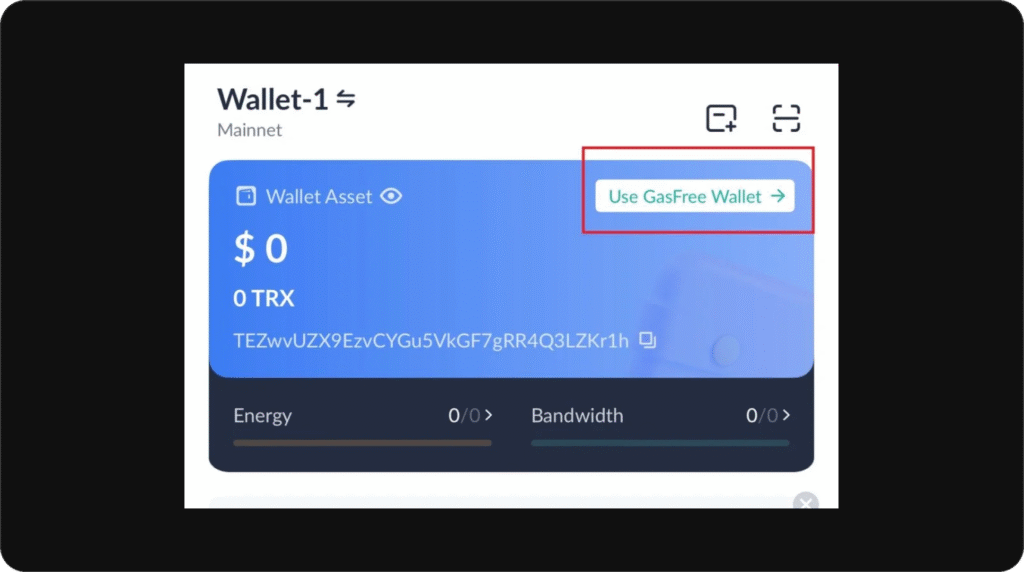
In TronLink, select «Use GasFree Wallet».
Press Send
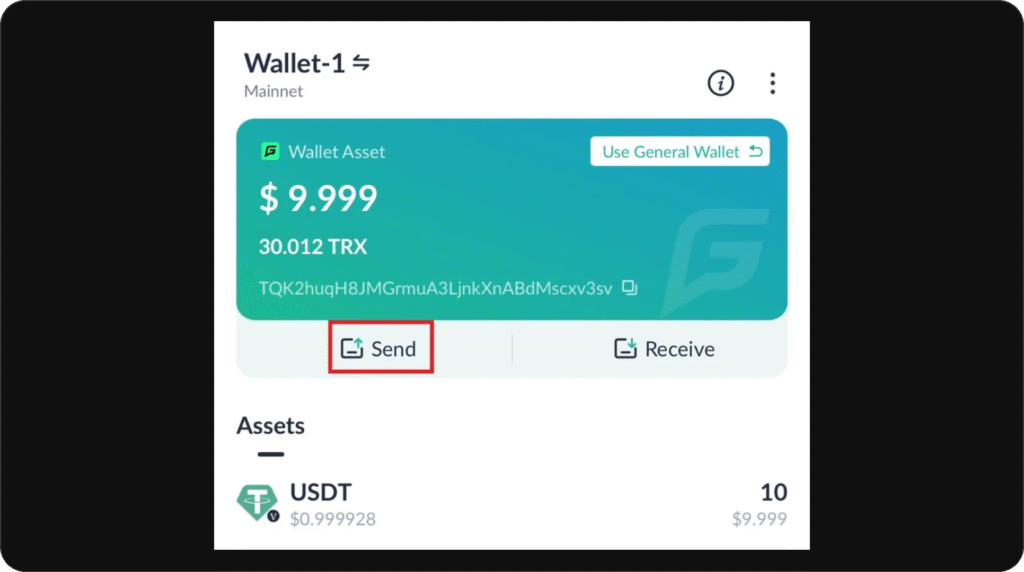
Enter the address of the recipient
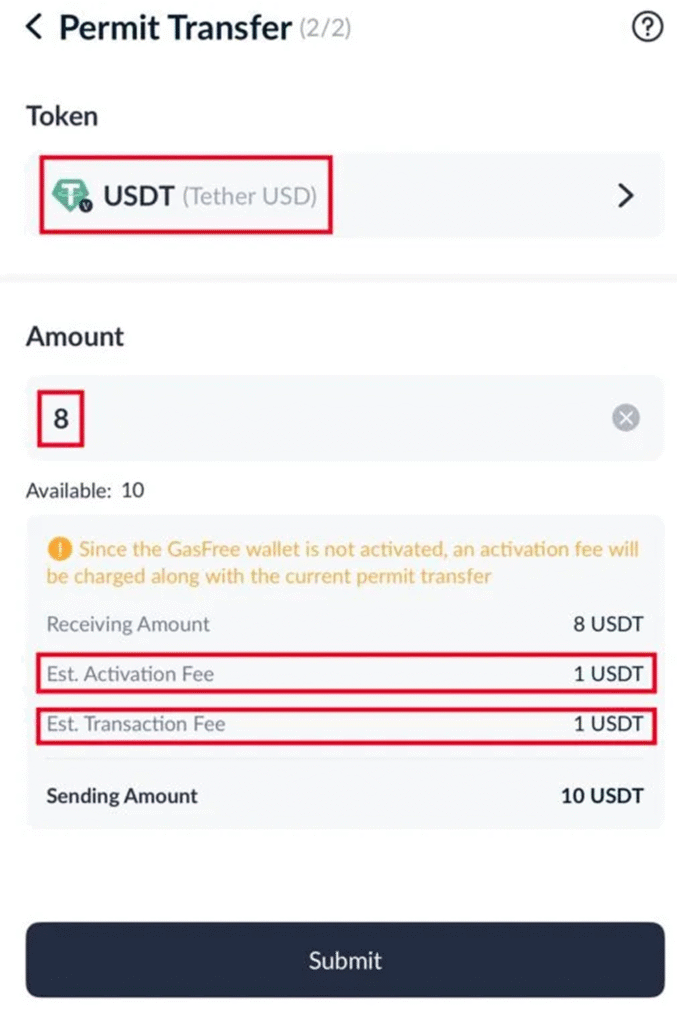
Select the token (USDT) and the amount.
- Activation Fee 1$ - activation fee. (debited 1 time.)
- Transaction Fee 1$- current service fee.
Both are written off in USDT.
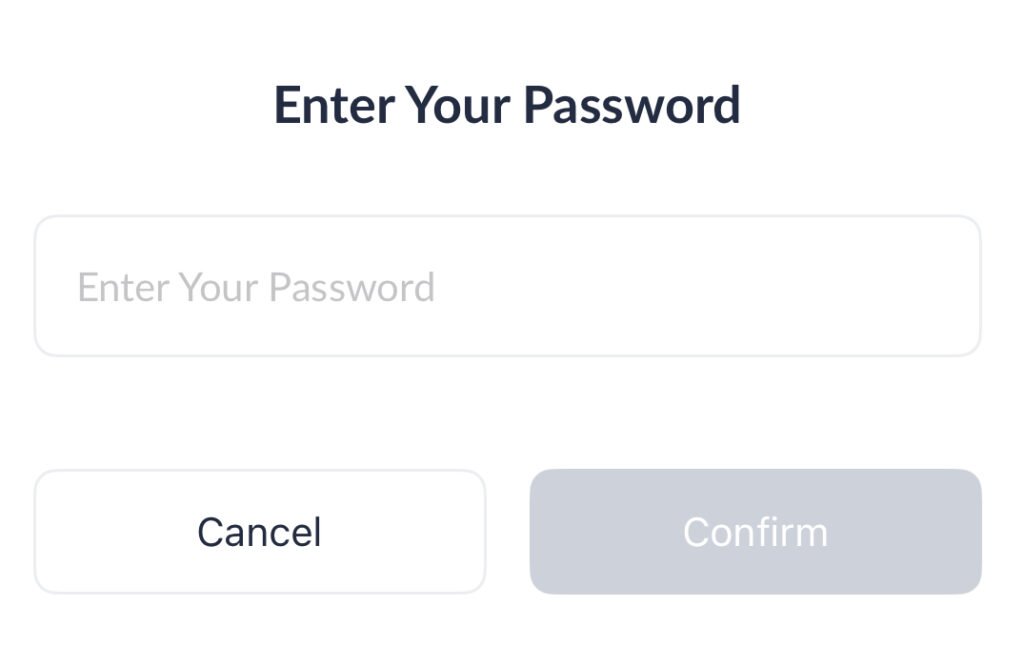
*After clicking “Submit”, it may ask for a password if one is set.
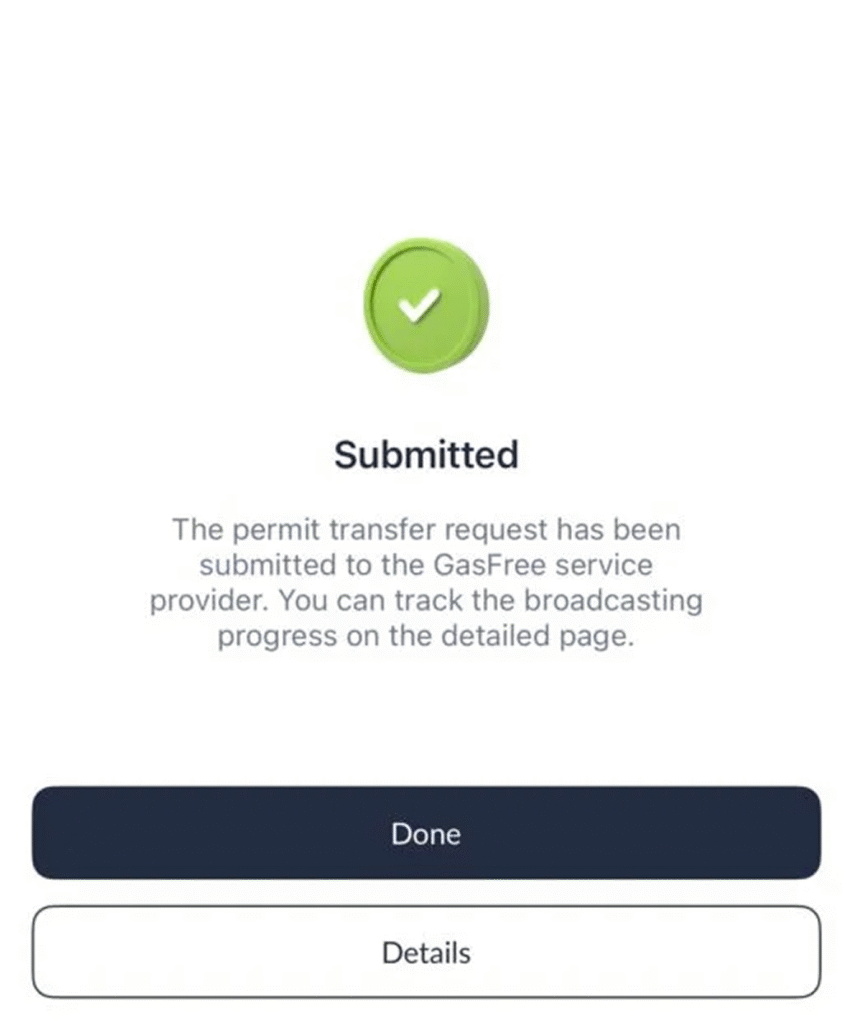
The transfer has been successfully completed.
3. Obtaining an address for the transfer.
In GasFree Wallet, tap «Receive.» («Receive»).
It will appear on the screen:
- Yours TRC-20 address.
- QR code for easy scanning.
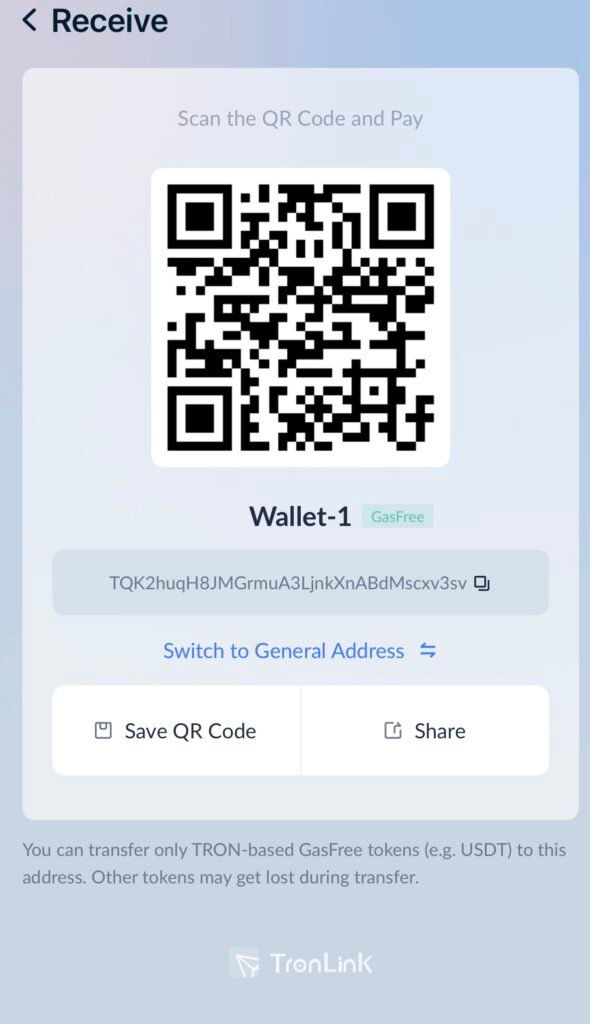
You can:
- Press «Copy» and send the address by text.
- Share QR code, If the sender is nearby or has a scanning function.
Important: Always specify that the transfer should go over the network TRC-20 (TRON).
Transfers from other networks (ERC-20, BEP-20) will not be received and the funds will be lost.